RTOS vs Arduino Super Loop
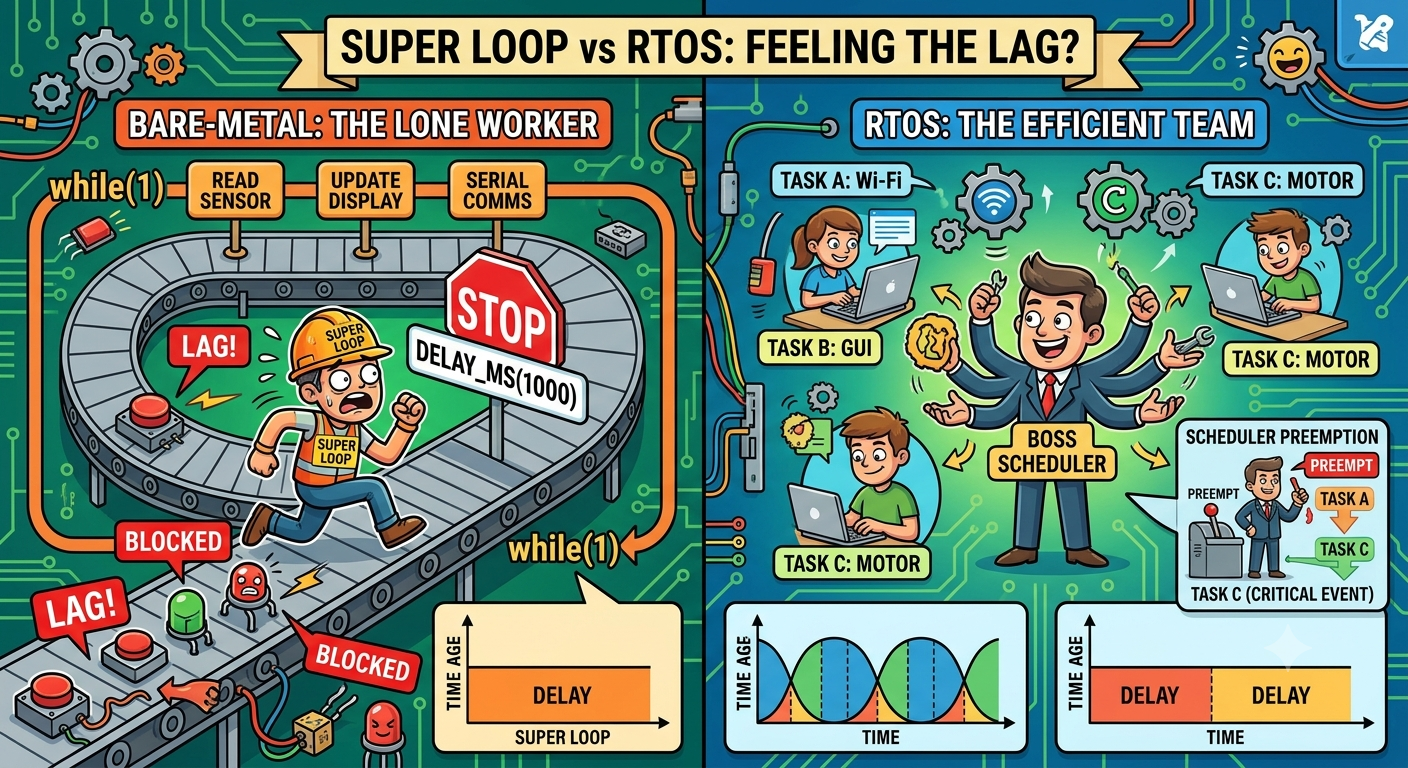
When you build firmware for a microcontroller, you usually end up choosing between two patterns: the simple Arduino-style loop() or a full RTOS-based design. Both can work well, but they solve different problems.
The Arduino super loop is easy to understand: run setup once, then repeatedly execute the same code in a loop. An RTOS, on the other hand, gives you multiple tasks that can run concurrently, wake up on timers, wait for events, and share the CPU in a controlled way.
This article explains the trade-offs so you can choose the right approach for your project.
1. Arduino Super Loop: simple and direct
The Arduino model is excellent for small embedded projects:
 1void setup() {
 2  pinMode(LED_BUILTIN, OUTPUT);
 3}
 4
 5void loop() {
 6  digitalWrite(LED_BUILTIN, HIGH);
 7  delay(500);
 8  digitalWrite(LED_BUILTIN, LOW);
 9  delay(500);
10}
The code is very easy to read and debug. You do not need a scheduler, mutexes, or task priorities. For many beginner and hobby projects, this is the fastest path from prototype to working hardware.
Strengths of the super loop
- Minimal setup and low learning curve
- Easy to reason about for small systems
- Very low memory overhead
- Works well for polling sensors and simple control logic
Limits of the super loop
The more features you add, the harder it becomes to keep the loop responsive.
If one part of the code blocks for too long, other things are delayed. A typical example is this:
1void loop() {
2  readSensor();
3  processData();
4  sendToNetwork();
5  updateDisplay();
6}
This works fine at first. But once you add Wi-Fi, timing-sensitive sensors, state machines, serial protocols, or user input, the loop can become a bottleneck. If sendToNetwork() waits too long, a button press or a timer may be missed.
2. RTOS: structured concurrency
An RTOS provides a scheduler that runs tasks based on priorities and timing. Each task can do one job, such as reading sensors, handling communication, or controlling motors.
A simplified example looks like this:
 1void taskReadSensor(void *arg) {
 2  for (;;) {
 3    readSensor();
 4    vTaskDelay(pdMS_TO_TICKS(10));
 5  }
 6}
 7
 8void taskHandleNetwork(void *arg) {
 9  for (;;) {
10    sendToNetwork();
11    vTaskDelay(pdMS_TO_TICKS(100));
12  }
13}
14
15void app_main() {
16  xTaskCreate(taskReadSensor, "sensor", 2048, NULL, 2, NULL);
17  xTaskCreate(taskHandleNetwork, "net", 4096, NULL, 1, NULL);
18}
With an RTOS, your firmware can be split into independent tasks that cooperate through events, queues, semaphores, and message passing.
Strengths of RTOS
- Better task isolation and modularity
- Deterministic response with priorities and scheduling
- Easier to handle multiple time-sensitive tasks
- Good fit for communication stacks, BLE, Wi-Fi, and sensor fusion
Limitations of RTOS
- More complex code and debugging
- More memory consumption
- Requires careful design around synchronization
- Harder to reason about in small, simple systems
3. Real-time behavior: not the same as "RTOS always wins"
A common misconception is that the Arduino loop is not real-time. In reality, the loop can still be real-time enough for many embedded projects. The real question is whether your deadlines are strict and whether multiple independent behaviors need to coexist.
For example:
- A temperature logger with a 1-second poll interval: super loop is likely enough.
- A motor controller requiring precise timing under 1 ms: an RTOS or hardware timer design may be better.
- A device that must handle BLE, Wi-Fi, sensor sampling, and user interaction simultaneously: RTOS is usually the safer choice.
The key is not simply "RTOS is real-time and Arduino is not." It is whether your system has time-critical requirements and multiple concurrent responsibilities.
4. When to choose the super loop
Use the Arduino super loop when:
- The system is small and easy to understand
- Timing requirements are relaxed
- You want rapid development and simple maintenance
- You do not need strict concurrent execution
- You are prototyping or building a one-off device
Typical examples:
- Home automation prototypes
- Simple sensor dashboards
- Basic IoT nodes with one or two tasks
- Educational projects and demos
5. When to choose RTOS
Use an RTOS when:
- You need reliable timing for multiple tasks
- The project has communication + sensing + control all at once
- You want clean task boundaries and state isolation
- You need queues, timers, semaphores, or inter-task communication
- The system must stay responsive even under load
Typical examples:
- Robotics controllers
- Industrial monitoring systems
- Multi-sensor edge devices
- Connected devices with BLE, mesh, or cloud communication
6. Practical recommendation
A good rule is simple:
- Start with the Arduino super loop for a small, single-purpose design.
- Move to an RTOS when the firmware grows and the system starts to feel fragile.
Many developers begin in the super loop and only later refactor to an RTOS when they hit real constraints. That is often the fastest way to learn without overengineering.
A simple project may not need an RTOS at all. A complex one often cannot survive without one.
7. Final thoughts
The Arduino super loop is brilliant for simplicity and fast iteration. RTOS-based firmware is more powerful, but it also demands more discipline.
If your project is small, keep it simple. If your project has many independent responsibilities and timing requirements, an RTOS is the better long-term architecture.
The best choice is not the one that looks more advanced. It is the one that keeps your product reliable, maintainable, and on time.
In other words:
- Choose the Arduino super loop for simplicity.
- Choose RTOS for complexity and responsiveness.
Both are valid. The right one depends on what your firmware must do.